How to Etch Glass
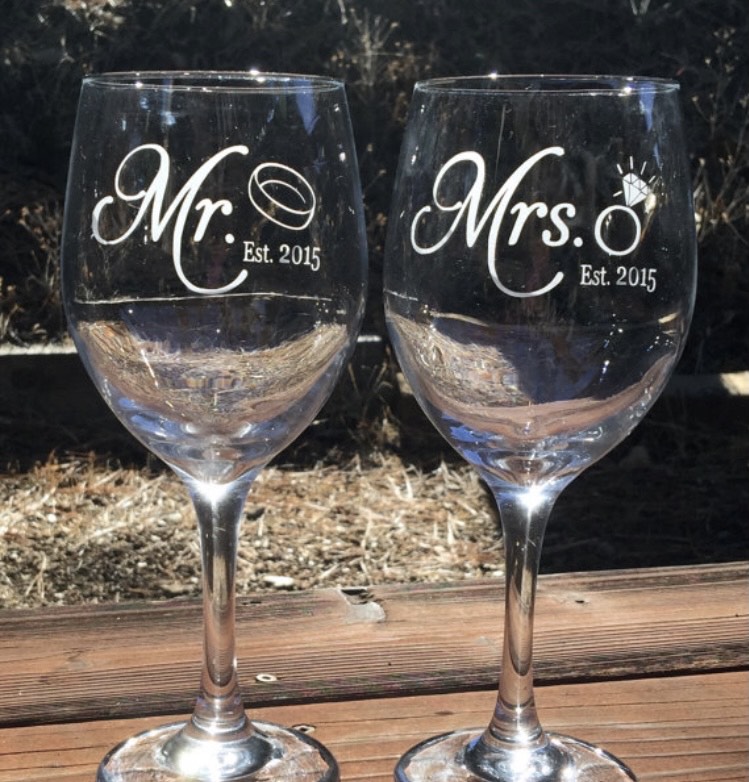
When my husband and I got married, I wanted to make some custom gifts for our wedding party. I chose to make custom beer steins and wine glasses! If you’ve never tried it, this is actually something you can easily do at home. It’s super easy and cheap!
There are so many possibilities of what you can make and these make great gifts. It doesn’t have to be wine glasses or beer steins you can etch anything glass… mason jars, beer mugs, trifle bowls, candles, etc… Just follow this etched glass tutorial and then sit back and admire the beautiful etched glass that you made!
Material List
Etching Cream
Glass of your choice – I bought a lot of my wine glasses from the Dollar Tree and beer steins online.
Vinyl
Transfer Tape
Cricut Cutting machine or order a set of stencils on line. Lots of people make custom stencils.
Paintbrush
First thing you’ll want to do is cut out your design on vinyl. If you don’t have a cricut cutting machine you can use any cutting machine, buy something off Etsy or even use stickers. For this project, we are using the vinyl as a stencil so you will want to weed OUT the design. Weeding Out the design means you’ll print the negative space. You’ll want to reverse the wording so it prints just the letters. You’ll want to leave a 1/2 inch to an inch of vinyl around the design so the cream doesn’t run over. If you are ordering a custom stencil you can let them know this as well.
Apply transfer tape to your vinyl and then apply it to the glass where you want it. The custom printed ones from Etsy will likely have this on them. With rounded surfaces(like wine glasses or ornaments), I usually make slits around the edge to make sure it lays down flatter.
I pull on the vinyl a little and stick it down really tight. Press all around to make sure it is really stuck everywhere!Then remove the transfer tape. This leaves the stencil in place for the etching cream to be spread.
Since some of the edges weren’t very thick I added some painters tape around to keep the cream from touching the glass where I don’t want it!
Then you’re going to apply the etch cream. Make sure you do this in a ventilated area, it’s pretty smelly! Dip a paintbrush into the cream and dab it onto the design. Make sure there is enough to cover the exposed area but not so much that it drips. If you get drips, turn the glasses upside down halfway through if they seem to be running a little. I leave it on for about 15-20 minutes. You can scrape some of the etch cream off with the paintbrush to put extra back in the bottle if you want. Then take it to a sink and rinse off the cream with soap and water. Peel off the vinyl and wash the whole glass. Then hold it up in the light and admire your etched glass masterpiece! I made quite a few for our wedding and still use them over 6 years later!