Faux Tin Ceiling
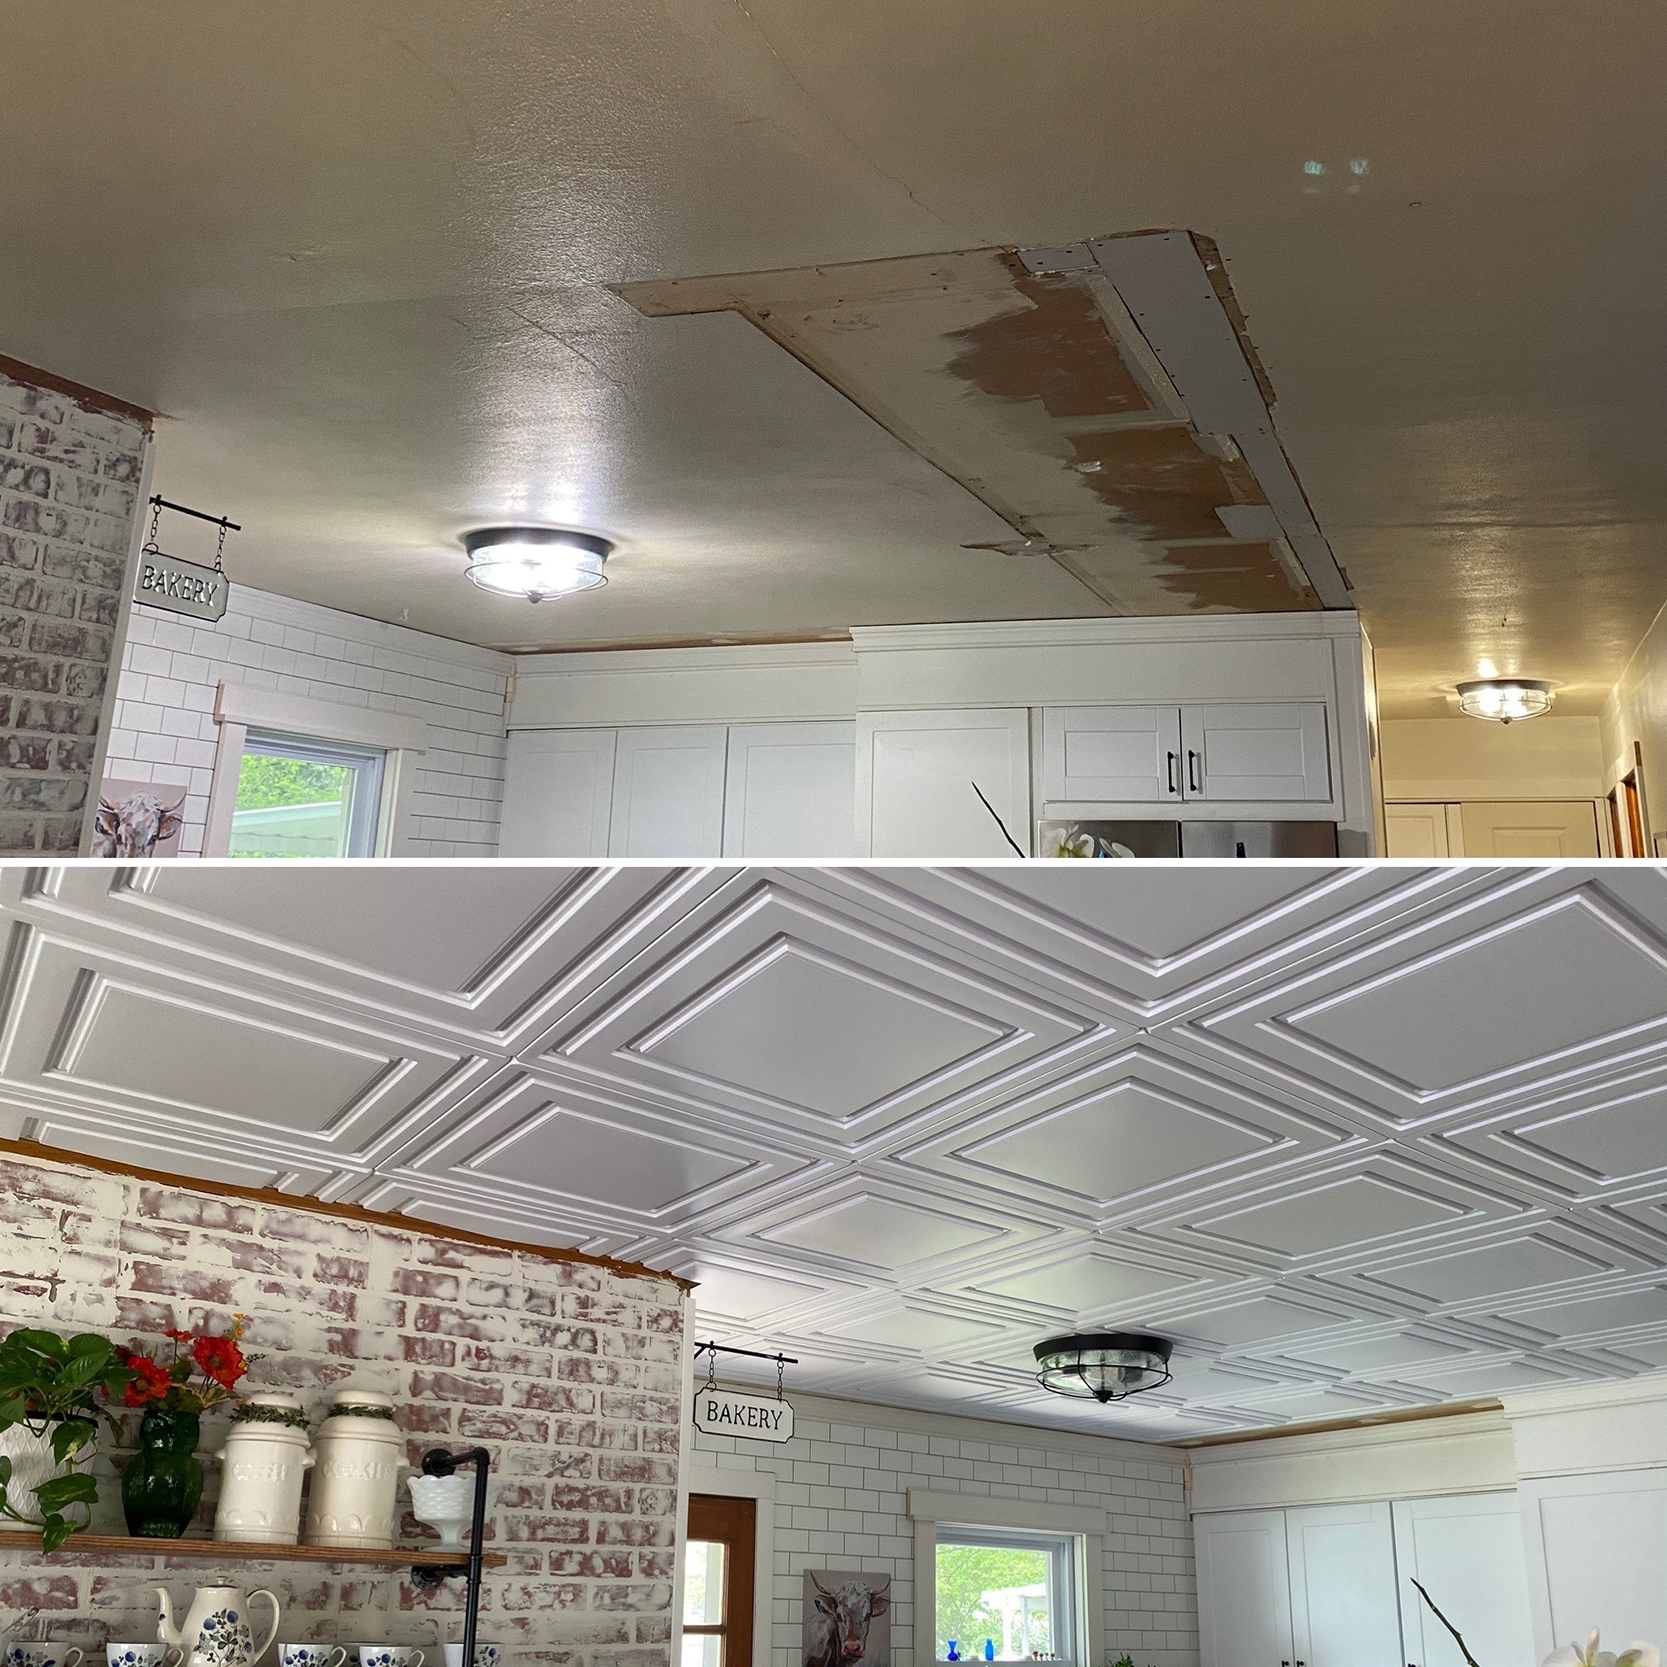
After remodeling our kitchen and removing the wall we had a big patch on our ceiling that was unfinished. We tossed around lots of ideas about how to repair or cover it. Ultimately, we decided on plastic tiles!
I’m going to show you how to install glue-up faux tin ceiling tiles so you can transform your ceilings from so-so to spectacular. Even though it was done in a small room, you can certainly incorporate the same easy steps in a much larger room.
Before we even got started, we ran into some concerns such as:
Do we cover the entire ceiling with it?
Do we place the crown molding on top of the tin ceiling tiles or install it flush against the edge of the crown?
This is also a technique you can use if you have existing crown molding that you don’t want to remove. If you have standard trim you’ll likely have to fill gaps somehow.
A few things you should know about this product:
- The 2′ X 4′ panels are made from thin, flexible and lightweight thermoformed plastic. Since they’re flexible, you might want an extra hand to help you put them up.
- They can easily be cut with scissors or a razor.
- The white panels are paintable. I’d suggest using a spray primer before painting. It’ll also be easier to paint them before installation. Or you can buy the tiles that look like silver, bronze or copper found. Personally, I love the understated beauty of the white tiles.
- You can use these to cover popcorn ceilings, but make sure the ceiling is clean and secure first. The glue will create a self-leveling effect but you’ll need to use slightly more glue than if gluing to a flat surfaces.
- Since the panels overlap when locked together, you lose a half inch. So take that into consideration when planning how many you need.
- They’re great for areas that get a lot of humidity like bathrooms. You don’t have to worry about them rusting like real metal tiles.
How to install a faux tin tiles
Step 1:
Gather your materials. You’ll need a straight razor, scissors, tape measure, chalk line reel, straight edge, and the manufacturers suggested adhesive. It bonds almost instantly with some pressure and it’s repositionable for up to 15 minutes. You’ll use a little less than 1/4 a tube of adhesive per panel.
Step 2:
Find the center of your ceiling and mark it in both directions by either snapping a chalk line or marking it with a straight edge and pencil.
Step 3:
Apply the adhesive to the ceiling. Put enough for one or two panels at a time. You also have the option of applying the adhesive to the back of the panels first. I also added extra adhesive at the corners and raised seem lines.
Step 4:
Attach your first panel at the center line and give it some firm pressure. Apply pressure on the raised portions of the panels.
Step 5:
Place a very small bead of adhesive in the “dash” channel of your next ceiling tile then lock it into the other panel.
Step 6:
Once the glue has about 15 minutes to set up, you can cut around the ceiling box with a razor knife. The panels are thin enough to feel where you need to cut. Be sure to cut off the power first.
Step 7:
Now, all that’s left to do are the finishing touches such as crown molding and trim around the panels. The 3/4” trim we applied around the outside edge of the panels was primed and painted before we nailed it in place.
So, there you have it! After a few hours of work, we now have a ceiling that’s far from being bland, don’t you think?
Do you have a ceiling in your home that needs a creative touch such as faux tin ceiling tiles? Give these a try! They come in many different textures and patterns!