Resin 101
I want to introduce you to one of my favorite mediums to work with, resin! It’s so versatile and can be used with most art mediums and several home projects.
I started working with resin over a five years ago, and it has become one of my favorite hobbies! For the longest time I was too intimidated to try it - and chances are that you are, too. Everyone has to start somewhere, and I'm here to help. I want to share a "Resin 101" series to show you just how much fun working with resin can be and give you all of my tips and tricks!
Before buying resin, you need to decide what kinds of projects you want to make. Artwork? Jewelry? Working with molds? Surprisingly, not all resins are the same! Choosing the right resin for your project is important to get the results you want.
Resin comes in two parts: resin and hardener. These two parts MUST be equally combined and mixed precisely for it to cure correctly. Always read the directions before starting your project! Every resin is a little different, and each one comes with instructions to successfully work with resin.
Envirotex Lite is a thicker resin mixture. It's perfect for finishing your project with a smooth surface or a "doming" effect with a high gloss finish. This resin is just what you need for covering artwork, serving trays, or covering to top of tile coasters.
EasyCast is a thinner mixture and is meant to be used for projects 6 oz. or less. It's the best kind of resin to use when working with molds to create jewelry pieces, pendants, charms, coasters, paperweights, knobs, and more.
FastCast is just that - fast! This is urethane casting resin cures in about 10 minutes and turns white (instead of clear) once it cures. Fast Cast can be drilled, sanded, shaped, and painted. It can also be colored opaque pigments and transparent dyes. I like to use this resin in molds to create all kinds of projects!
Now that you have an idea of which kind of resin to use, here are the other resin supplies that I consider essential.
Mixing Cups: Resin mixing cups have measurement lines, which allows you to get those precise measurements on your resin and hardener. Imprecise measuring and/or mixing can prevent the epoxy resin from curing correctly, which means a ruined project!
Stir Sticks: After measuring and combining the resin and hardener, you need to make sure you mix it thoroughly using a clean stir stick.
Gloves: When you are working with resin, you are working with chemicals. Make sure you protect your skin by wearing gloves. Safety glasses are also a good thing to have around! I also recommend protecting your workspace with a silicone mat make clean-up a breeze.
Resin Molds: There are SO many choices out there, and in almost any shape imaginable! I recommend using molds made of silicone or propylene. I find most of my molds on Amazon, Etsy, and even make my own molds.
Mold Release: Molds are an investment, and a mold release and conditioner will prolong the life of your molds. It will also help the resin to be easily removed once it has cured.
Heat Gun or Lighter: Getting bubbles in your resin is a common occurrence. The trick to removing them is with a little bit of heat! I prefer a lighter for small projects and the heat gun for larger projects.
Resin Colorants: You can easily add color to your resin mixture using transparent dyes, opaque pigments, alcohol inks and glitter.
Now that we have some of the basics out of the way. I want to share some project ideas for resin.
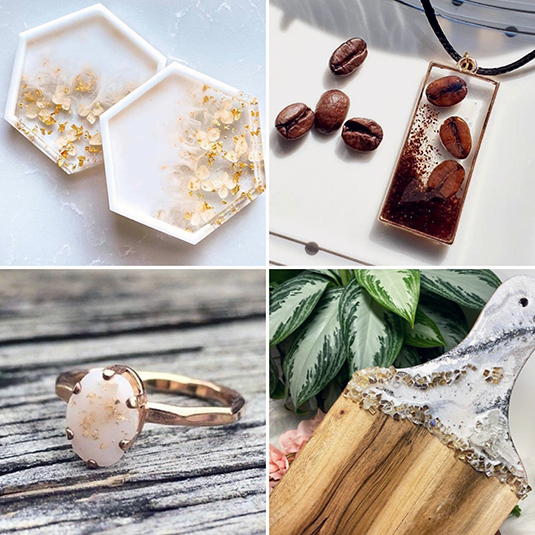
I love make resin jewelry with inclusions, like rose petals from a special day or ashes of a loved one. I like to capture a memory in a glass, like time capsule. You can make coasters with flowers from your special day or jewelry to keep with you all the time. You can make something beautiful to remember that moment.
You can make games! I have my eye on a resin domino game and dice game! I have seen a resin game board for monopoly! They even made all the houses and hotels for the game. The world of resin is limitless!