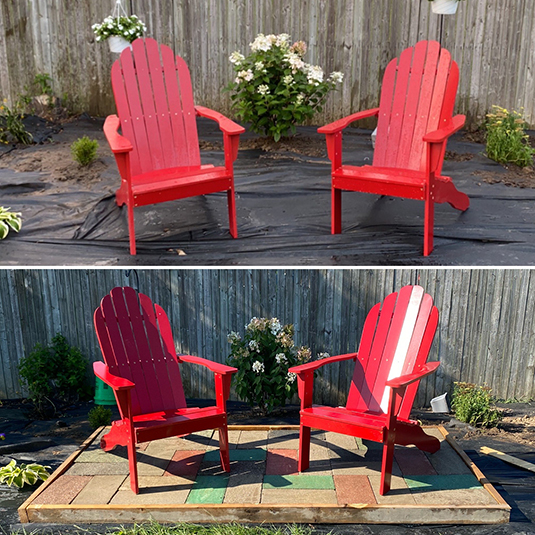
Small Raised Paver Patio
Sometimes you are in the middle of a project and realize you need something else! This happened to me when I was creating my back garden scape. I placed my new Adirondack chairs in there place. They were a perfect fit, if the ground didn’t slope down in the back! I knew I needed to make an elevated bed for them. I had recently found a ton of old pavers in the yard and knew this was the spot for them.
Steps to Create the Raised Frame
Step 1
I laid out my paver design on a flat surface and then measured the length and width. This gave me my measurements for my frame!
Step 2
After getting my measurements and adding a half inch on all sides, I started to assemble my frame. For this I up-cycled the wood 2x4 from our concrete job. I had some exterior screws left over from our deck and used those. If you have a speed square you’ll want to use it to get 90 degree corners. This is very important! You want your frame to be perfectly square. A tip if this is your first frame: 1) make your measurements go the inside of the box. I know this sounds like common sense, but it’s honestly often missed and creates a loss in lumber and supplies.
Step 3
If your space is already level you can skip this step. I took my long level and got a level measurement! Luckily for me, it was exactly one more 2x4 height. You want to have a small slope for water to drain off. I attached my 2x4 along the back edge and hammered it in place until level.
Step 4
To help the frame stay put I took some 2x2 treated lumber and cut them at 12”(2) and 18”(2) lengths with an angled end. The angled end will help the 2x2 go into the ground easier. I lined them up in the squared corners and hammered them in place. After grabbing a paver for depth placement, I screwed them into both sides of the lumber. Make sure to allow space for the sand and paver base.
Step 5
I decided to add some landscape fabric to help hold the paver base and sand in place. I simply stapled it to the the frame. Add a little slack for the weight of the paver base and sand.
Setting Pavers
Step 1
Add multiple bags of paver base until the area is completely covered. This mixture is made up of sand, dirt, and rock. It’s the base layer for your patio.
Step 2
Using the tamper tool, compact the paver base. This step is super important if you want an even and level patio that will withstand the test of time. Ground settling ruins so many paver patios, and this step prevents that from occurring.
Step 3
Next, add multiple bags of paver sand, raking it out as you go. You’ll want to add as many bags as it takes for the surface to be level. We used a method of skimming a 2 x 4 over the top to achieve a perfectly level surface. This process is called screeding. There’s no need to tamp the sand, because it will be perfectly level and packed at this point.
Step 4
Now for the fun part! Begin laying the pavers in your desired pattern. Repeat the pattern until you’ve filled the entire area.
Step 5
Add the polymeric sand. This last step is so important! This product is also called paver set and it ensures your paver patio stays put. This sand is very similar to grout, once it gets wet- it hardens, solidifying to keep everything in place and creates a barrier to keep weeds from growing in between the stones. Dump the sand directly onto the pavers, brush into the cracks with a broom, remove ALL excess sand , then wet the entire surface to set the pavers. There are detailed instructions on the packaging, but basically just hose it down with a spray setting, then you’re done!
I know it’s a lot of steps, but I feel they are easy and doable steps! After this we will surround the paver patio with river rock and enjoy it!