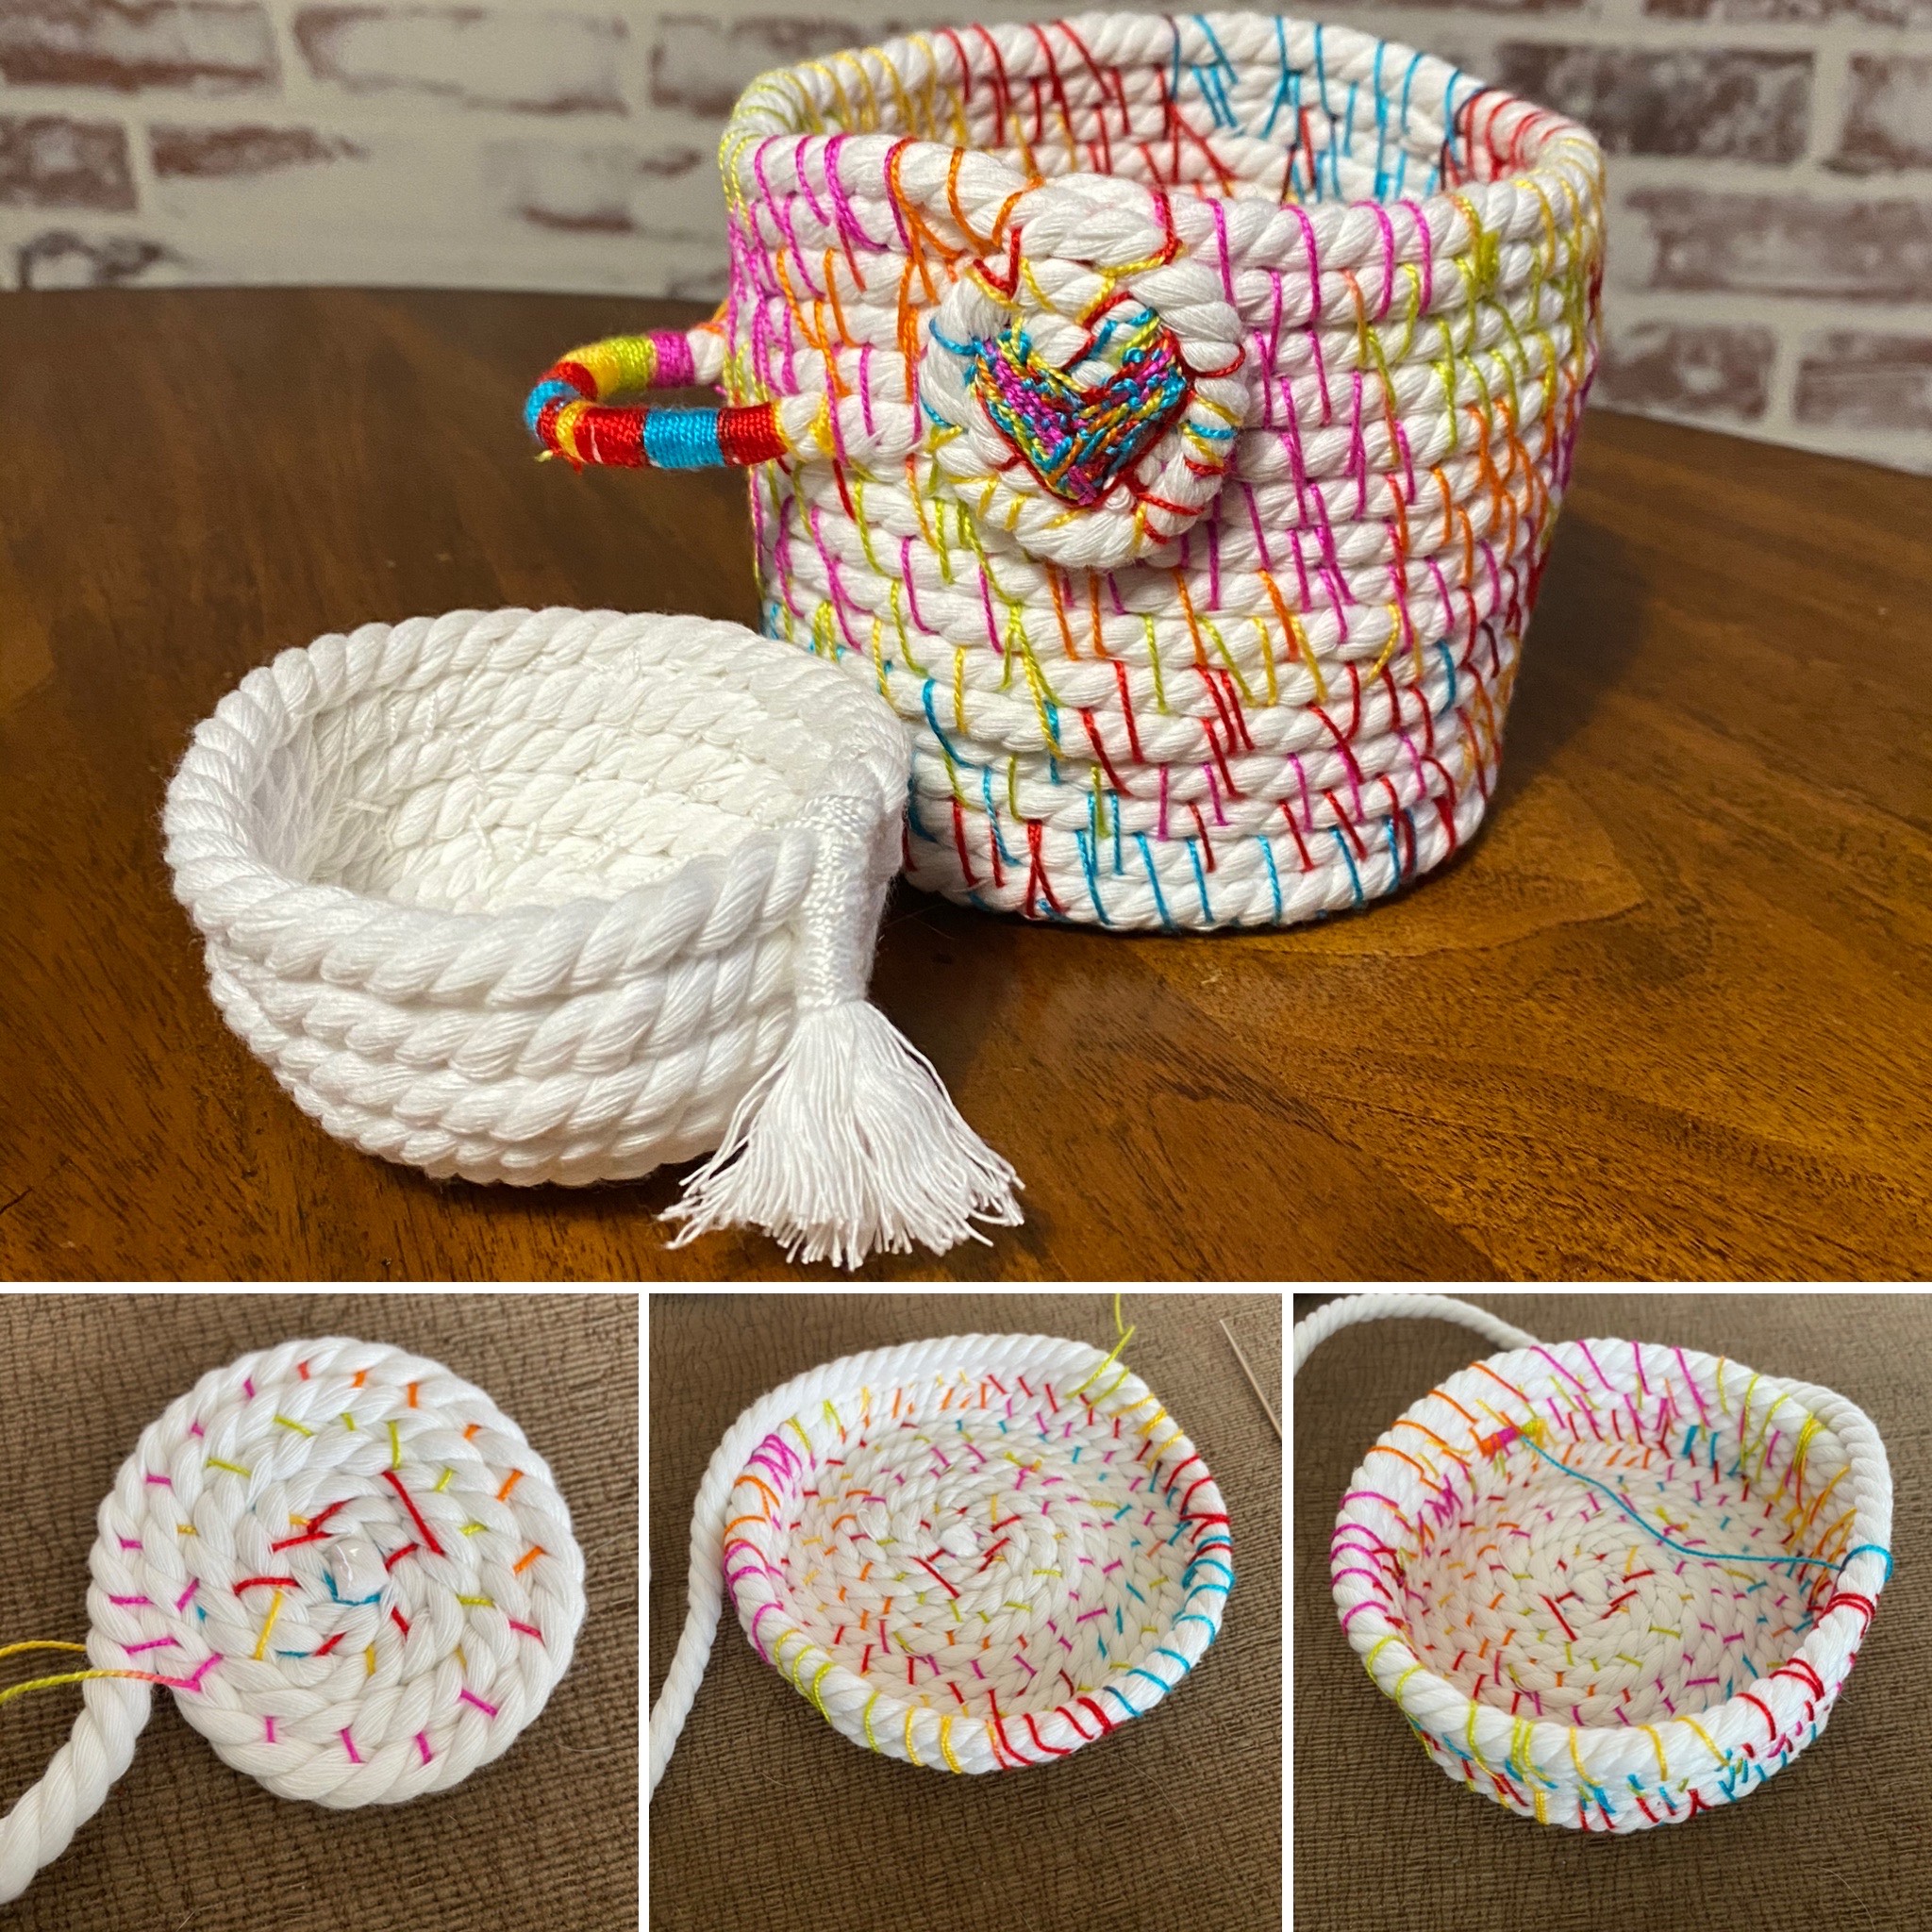
How to Make a Rope Coil Basket
I have always been a maker of all things. I love to create new projects or build things. Most people don’t like repetitive work, but I like it! It relaxes my mind and calms me. Making this coil basket is perfect for relaxing. The repetition of the stitches is soothing and random. No need for perfection on this! I have a rule: if I can make it, don’t buy it. One of my favorite bloggers feels the same way. I was inspired by her and her blog(we are scout) for this project.
Material List:
- 5 yards- Cotton Rope or Jute (4mm or 6mm)
- Embroidery Thread (floss)
- Long Embroidery Needle (3-6 inches)
- Scissors
- Glue (optional)
There is no need to cut the rope material, it just limits your basket size. For the embroidery thread, you want to cut it in to 4-5ft sections. This way you aren’t pulling all the thread through the entire basket. But you aren’t constantly stopping to add more string. You’ll add more string as you go, with small knots. Use a length that is manageable and won’t easily get tangled.
To start the coil, you want to create a “U” shape with the rope. Roll it tightly into a coil. When the diameter of the coil is 1 1/2 to 2 inches wide, thread your stringed needle through the sides of the coil. Make a tight “X” with the thread. This is the start of your baskets foundation. You want to over stitch this area. Repeat the “x” pattern until you are confident it is tight.
Now that the center of the coil is secure you can begin to stitch. Stitch over the top of two coils of rope and pass the needle down and between. The next stitch only wraps around one coil of rope. Instead of passing the needle through the gap allow it to catch a small section of the second coil of rope. This will make the vessel sturdy and secure. Continue coiling the rope around and alternating stitches over one piece of rope, then over two pieces of rope. Make sure the needle passes through the rope below at not just the gap. Continue to stitch around the coil at random but close intervals. To end a thread pass the needle through the stitch below and pull it tight. Take the needle underneath the coil base and knot it around another stitch. If it seems loose, pull it through the center of the rope, run the thread under a few of the stitches on the side of the previous coil, then cut the thread with a 2 inch tail. To start a new thread run it under the the last coil and tie a small knot two to three times. Place a dot of glue on the knot.
When you’re happy with the size of the base hold the rope on top and begin to build up the sides. For the first round all your stitches will wrap around both pieces of rope: the base and the new coil. After the first round go back to alternating stitches as before, making sure at least every second stitch passes through the rope in the previous round. When you are happy with the height of the basket continue stitching until you have completed a round. Look back at the base and find the place where you started to overlap it to make the side wall. The top should finish directly above that spot.
Cut the rope off on an angle so it tapers off. Continue stitching and secure the tapered end. I wrapped my string around the rope and occasionally stitch through the top few coils. Then I let the end ravel, to appear as a tassel. To finish off, knot the thread around a stitch and run the thread between two pieces of rope below so it disappears between them. Cut the thread off making sure the end isn’t visible. On my other basket I made a another coil, to resemble a tag and stitched it into the basket. Then I embroidered a small heart on the coil tag. Then I placed another knot in the thread and trimmed the thread.
I hope you find as much enjoyment from this project as I did. Keep learning and create beautiful things.